User manual for the remote control of the Oasis Comfort CL / EL series split-system
Руководство / инструкция
Совместимость с моделями кондиционеров
Линейка Oasis с поддержкой пульта
Этот пульт дистанционного управления разработан для сплит-систем Oasis нескольких серий. Если ваш кондиционер не откликается на команды, первым делом сверьтесь со списком совместимости — возможно, дело именно в модели.
Серия CL (экономичный режим ECO): Oasis CL-7, CL-9, CL-12, CL-18, CL-24, CL-28.
Инверторная серия EL: Oasis EL-9, EL-12, EL-18.
Серия Breeze BL с фильтром NanoAG: Oasis BL-7, BL-9, BL-12, BL-18, BL-24.
Практика показывает: даже в рамках одной серии могут быть модификации с разным ИК-протоколом. Проверьте маркировку на шильдике внутреннего блока — если есть сомнения, обратитесь в сервисный центр.
Меры предосторожности
Базовые правила обращения
Пульт — электронное устройство, а не игрушка. Знакомо, когда дети нажимают все кнопки подряд? Лучше сразу объяснить, что так делать не стоит.
- ✔️ Направляйте ИК-излучатель строго на внутренний блок кондиционера
- ✔️ Подтверждение приёма — короткий звуковой сигнал от сплит-системы
- ✔️ Рабочая дальность: до 8 метров по прямой, угол ±45° от оси блока
Между пультом и кондиционером не должно быть препятствий. Шторы, вазы, декоративные панели — всё это может блокировать сигнал. Иногда даже прозрачное стекло создаёт помехи, проверено.
Защита от внешних воздействий
Устройство чувствительно к механическим повреждениям и влаге. Не роняйте, избегайте ударов. Прямые солнечные лучи, батареи отопления, высокая влажность — враги электроники.
Важный нюанс: не используйте острые предметы для нажатия кнопок. Мембранный механизм рассчитан на нажатие подушечкой пальца. Бензин, растворители, влажные салфетки с химией — под запретом. Протирайте только сухой мягкой тканью.
Если пульт «завис»: извлеките батарейки, подождите полминуты, вставьте обратно. Не сработало? Замените элементы питания. И да, при хранении дольше месяца батарейки лучше вынимать — окисление контактов случается чаще, чем думают.
(!) Производитель может вносить изменения в конструкцию без уведомления. Стандартная практика, но при сравнении пультов разных партий стоит иметь это в виду.
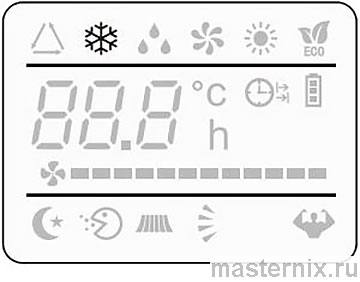
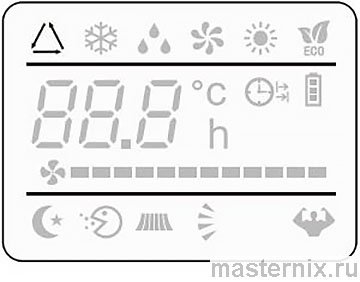
Обозначения элементов управления
Кнопки и их назначение
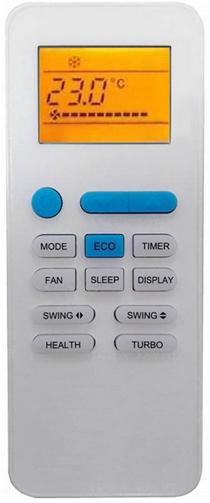
На изображении показан пульт с полным набором функций. Ваша модель может иметь чуть меньше кнопок — базовый функционал при этом сохраняется.
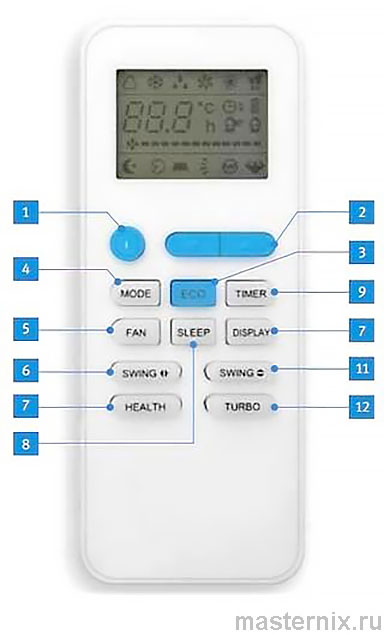
1. 【ON/OFF】 — включение и выключение кондиционера
2. 【SET】 — регулировка температуры (стрелки вверх/вниз); в режиме AUTO функция неактивна
3. 【ECO】 — экономичный режим: +2°С в охлаждении, −2°С в обогреве относительно заданного значения
4. 【MODE】 — переключение режимов: AUTO → COOL → DRY → HEAT → FAN
5. 【FAN】 — выбор скорости вентилятора: низкая / средняя / высокая / авто
6. 【SWING】 (горизонтальная) — регулировка положения горизонтальных жалюзи
7. 【HEALTH】 — не активна в данной версии пульта
8. 【SLEEP】 — включение/отключение ночного режима
9. 【TIMER】 — программирование работы: интервал от 0,5 до 24 часов
10. 【DISPLAY】 — включение/отключение подсветки дисплея
11. 【SWING】 (вертикальная) — регулировка вертикальных жалюзи
12. 【TURBO】 — интенсивный режим для быстрого достижения целевой температуры
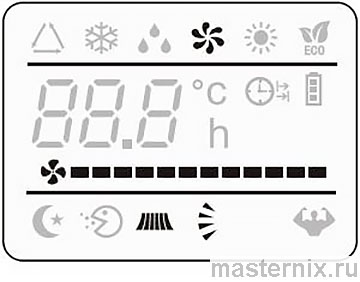
Индикаторы на дисплее
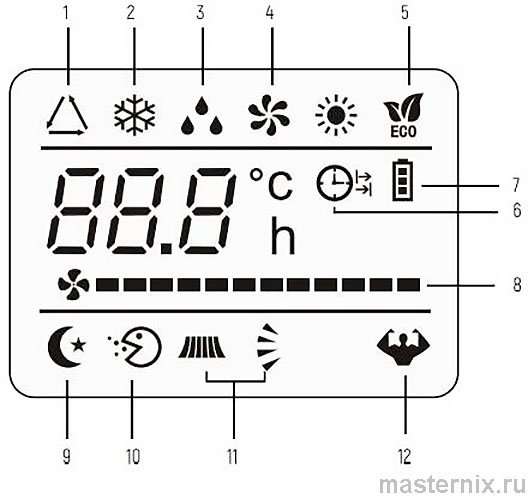
Экран отображает активные режимы и состояние системы:
- ★ AUTO, COOL, DRY, FAN, HEAT — основные режимы работы
- ★ ECO, TIMER, SLEEP, TURBO — специальные функции
- ★ Индикатор батареи — мигает при низком заряде
- ★ Скорость вентилятора — визуальная шкала
- ★ Направление заслонок — иконки горизонтального/вертикального свинга
Всё интуитивно: горит — активно, мигает — ожидает подтверждения. Если значок пропал — функция отключена.
Подготовка к работе
Установка элементов питания
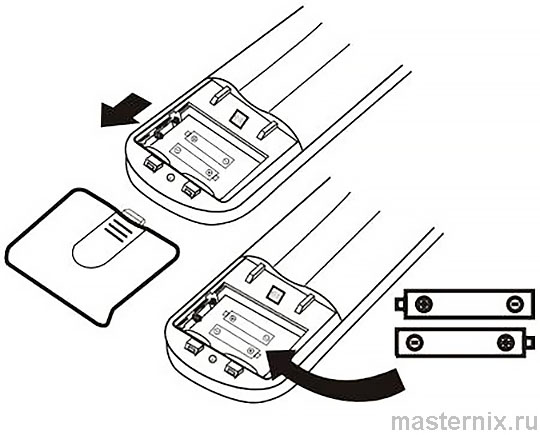
Процесс простой, но есть детали:
- Сдвиньте крышку батарейного отсека по направлению стрелки
- Вставьте две батарейки типа AAA (LR03) 1.5 В, соблюдая полярность +/−
- Закройте отсек до щелчка
(!) Примечание: используйте только новые щелочные батарейки. Аккумуляторы не рекомендуются — их напряжение может быть недостаточно для стабильной работы ИК-передатчика.
Если дисплей не светится или команды не проходят — первым делом замените элементы питания. И утилизируйте старые батарейки согласно местным нормам.
Переключение °C / °F
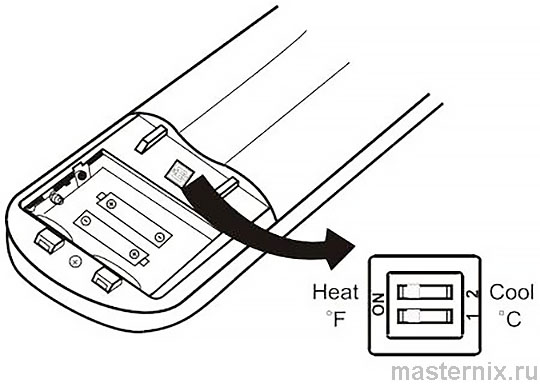
Под задней крышкой расположен двухрядный переключатель:
| Положение переключателя | Значение |
|---|---|
| C | Отображение температуры в градусах Цельсия |
| F | Отображение в градусах Фаренгейта |
| Cool | Пульт настроен только на режим охлаждения |
| Heat | Пульт настроен только на режим обогрева |
(!) После изменения положения переключателя обязательно извлеките и заново установите батарейки — иначе настройки не применятся.
Настройка базового режима
Выбор между охлаждением и обогревом
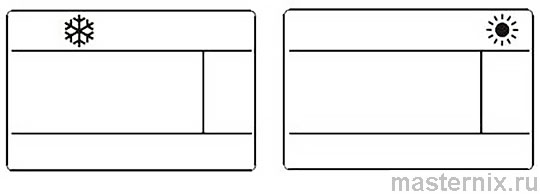
При первой установке батареек на экране начинают мигать символы охлаждения и обогрева. Нажмите любую кнопку в момент, когда горит нужный значок — пульт запомнит выбор.
Выбрали значок охлаждения — пульт будет работать только в режиме 【COOL】. Выбрали обогрев — только 【HEAT】. Это защищает от случайного переключения, но ограничивает гибкость. Хотите оба режима? Оставьте переключатель в нейтральном положении, если такая опция предусмотрена.
(!) Направляйте пульт на кондиционер, убирайте препятствия, избегайте прямых солнечных лучей. Храните устройство не ближе 1 метра от телевизоров и другой электроники — возможны помехи.
Рекомендации по размещению
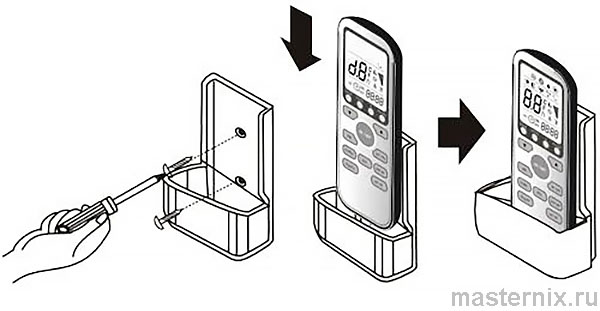
Пульт можно разместить на специальной настенной подставке. Удобно, но помните: ИК-сигнал требует прямой видимости. Если пульт в подставке за шторой — сигнал может не пройти.
Контроль направления воздушного потока
Регулировка жалюзи
Равномерное распределение воздуха — залог комфортного микроклимата. Кнопка 【SWING】 управляет положением заслонок:
- → Вертикальное качание (вверх-вниз) для охвата всей высоты помещения
- → Горизонтальное направление (слева-направо) — опция «4D Air flow», доступна в отдельных моделях
Практический совет: в режиме охлаждения направляйте поток горизонтально — холодный воздух опускается сам. В режиме обогрева разверните заслонки вниз — тёплый воздух поднимается, и такое положение ускоряет прогрев комнаты.
(!) Ручная регулировка дефлекторов возможна только при выключенном приборе. Попытка поправить заслонки во время работы может повредить хрупкий механизм.
(!) Никогда не вставляйте пальцы или предметы в воздуховод! Вращающиеся на высокой скорости лопасти вентилятора опасны.
Основные режимы: охлаждение и обогрев
Охлаждение (COOL)
Нажмите 【MODE】 до появления значка  . Установите температуру ниже текущей в помещении с помощью кнопок 【SET】.
Для эффективной работы настройте также скорость вентилятора 【FAN】 и направление потока 【SWING】. Кондиционер сам подберёт циклы компрессора, но ваша предварительная настройка ускорит достижение комфорта.
Обогрев (HEAT)
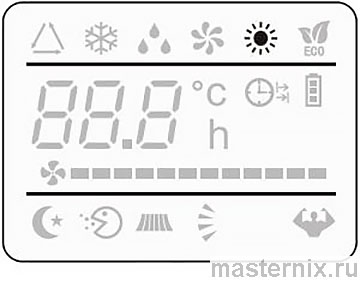
Активируйте режим нажатием 【MODE】 до значка  . Установите температуру выше комнатной.
(!) Функция «Hot Start»: при включении обогрева вентилятор запускается с задержкой 2-5 минут — это нормально, система прогревает теплообменник, чтобы не дуть холодным воздухом.
(!) В холодную погоду может автоматически запускаться цикл разморозки (2-10 минут). Вентиляторы останавливаются, на дисплее может мигать индикатор. После завершения кондиционер вернётся к обогреву.
Программирование таймера
Автоматическое включение

Работает только при выключенном кондиционере:
- Нажмите 【TIMER】
- Задайте желаемую температуру и режим кнопками 【MODE】 и 【SET】
- Снова нажмите 【TIMER】 и установите время до включения стрелками
(!) Перед настройкой таймера обязательно выключите кондиционер кнопкой 【ON/OFF】 — иначе команда не сохранится.
(!) Отмена: ещё раз нажмите 【TIMER】. При отключении электроэнергии таймер сбрасывается — настройте заново.
Автоматическое выключение
Программируется при включённом кондиционере. Нажмите 【TIMER】, установите время до выключения. Шаг настройки — 30 минут.
Лайфхак: установите выключение через 2-3 часа после засыпания — экономия энергии без потери комфорта.
Вентиляция, осушение и авторежим
Режим вентилятора
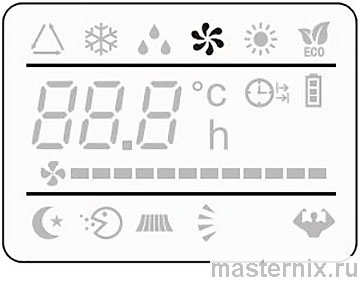
Для чистой циркуляции воздуха без изменения температуры выберите режим вентилятора: 【MODE】 → значок  . Скорость переключается кнопкой 【FAN】: низкая → средняя → высокая → авто.
В памяти кондиционера сохраняется последняя установленная скорость. В автоматическом режиме система сама подбирает параметры под текущие условия.
Осушение (DRY)
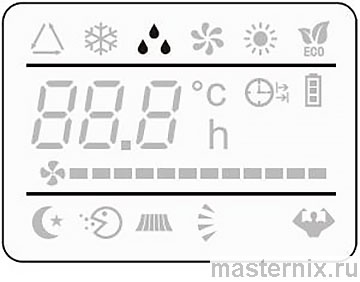
Активируется значком  . Система чередует короткие циклы охлаждения и паузы — снижает влажность без сильного падения температуры. Идеально в сырую погоду.
Автоматический режим (FEEL)
Активируется значком  . Кондиционер сам выбирает режим и температуру на основе данных с датчика во внутреннем блоке.
| Температура в помещении | Выбранный режим | Целевая температура |
|---|---|---|
| ‹ 20°С | Обогрев (или вентиляция) | 23°С |
| 20°С ~ 26°С | Осушение | 18°С |
| › 26°С | Охлаждение | 23°С |
Можно скорректировать целевую температуру на ±2°С кнопками 【SET】. Удобно, когда не хочется вникать в настройки.
Ночной режим SLEEP
Комфортный сон без перепадов температуры

Нажмите 【SLEEP】 до появления значка  . Система плавно корректирует температуру: в охлаждении +1°С каждый час (макс. +2°С за 2 часа), в обогреве — аналогично в обратную сторону.
Через 10 часов кондиционер автоматически выключится. Идеально для ночного использования: тихо, экономно, без риска проснуться от холода или жары.
Есть нюанс: если в комнате резко изменится температура (открыли окно, включили обогреватель), система может не успеть адаптироваться. Лучше закрывать окна перед активацией режима.
Решение типичных проблем
Пульт не управляет кондиционером
Возможные причины и решения:
- ✖️ Сели батарейки → замените на новые щелочные AAA
- ✖️ Препятствие между пультом и блоком → уберите шторы, декор, проверьте прямую видимость
- ✖️ Помехи от другой электроники → отодвиньте пульт от ТВ, роутеров, микроволновок
- ✖️ Неправильный режим (только Cool/Heat) → проверьте переключатель под крышкой
Если ничего не помогает: извлеките батарейки на 30 секунд, вставьте обратно. Сброс часто «лечит» зависания электроники.
Дисплей пульта не светится
Первым делом — проверьте полярность батареек. Затем попробуйте новые элементы. Если проблема остаётся, возможно, повреждён контакт в отсеке — аккуратно почистите его ластиком.
И последнее: если пульт падал или намокал, внутренние компоненты могли пострадать. В таком случае проще заменить устройство, чем ремонтировать.
Помните: бережное обращение и своевременная замена батареек продлевают жизнь пульта на годы. А правильная настройка режимов делает использование кондиционера по-настоящему комфортным.


