User manual for Monlan MSH-7, Monlan MSH-9 air conditioner remote control
Руководство / инструкция
Безопасная эксплуатация пульта
Базовые правила обращения
Пульт дистанционного управления для кондиционеров Monlan MSH-7 и MSH-9 работает по инфракрасному каналу. Простые рекомендации обеспечат стабильную связь с внутренним блоком.
- Направляйте ИК-передатчик прямо на приёмник кондиционера
- Максимальная дальность — 10 метров по прямой
- Исключите препятствия между пультом и блоком
- Размещайте устройство не ближе 1 метра от ТВ и радиоаппаратуры
Чего категорически избегать
Электроника не терпит небрежности. Бережное обращение продлит срок службы пульта.
- ✖️ Попадание жидкостей на корпус
- ✖️ Прямые солнечные лучи и перегрев
- ✖️ Падения, удары, механические повреждения
- ✖️ Использование острых предметов для нажатия кнопок
Если пульт «завис» — извлеките батарейки, подождите 30 секунд, вставьте обратно. Часто это решает проблему без визита в сервис.
Расшифровка кнопок и дисплея
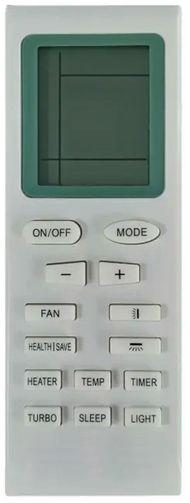
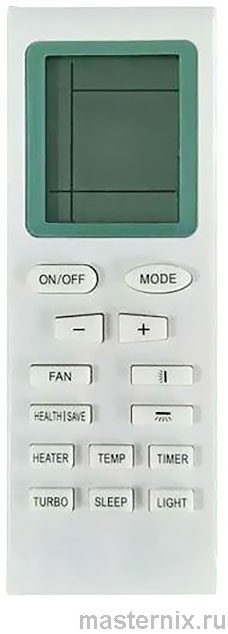
Общий вид пульта управления
Пульт универсальный: подходит для различных моделей блоков. Некоторые функции могут быть недоступны в вашей конфигурации — при нажатии такой кнопки система продолжит работу без изменений.
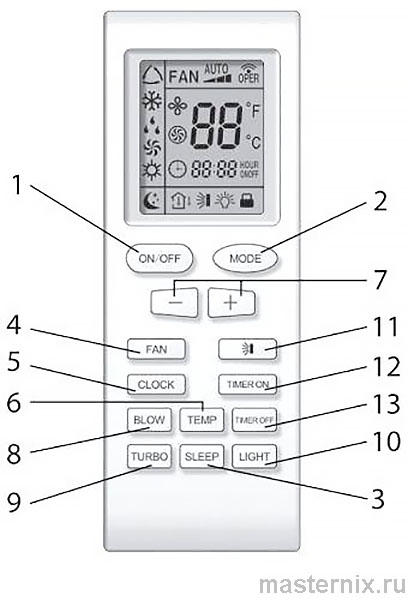
1. Включение и выключение 【ON/OFF】
Одна кнопка управляет питанием системы. В режиме ожидания дисплей показывает текущую температуру в помещении.
2. Выбор режима 【MODE】
Циклическое переключение пяти программ:
【AUTO】 → 【COOL】 → 【DRY】 → 【HEAT】 → 【FAN】 → 【AUTO】
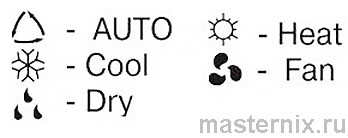
(!) В моделях «только холод» режим 【HEAT】 отсутствует — это нормально.
3. Ночной режим 【SLEEP】
Попеременное нажатие включает/выключает функцию. На дисплее появляется значок  .
.
Доступен в режимах 【COOL】 и 【HEAT】. В 【FAN】 и 【AUTO】 функция не активируется. При выключении кондиционера 【SLEEP】 автоматически сбрасывается.
4. Скорость вентилятора 【FAN】
Циклическое переключение:
Auto → Низкая → Средняя → Высокая → Auto
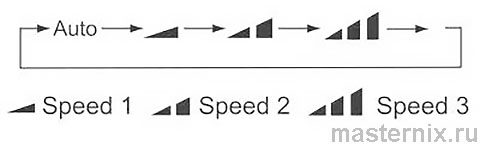
В авторежиме система сама подбирает скорость. В режиме 【BLOW】 вентилятор работает на минимальных оборотах.
5. Настройка времени 【CLOCK】
Алгоритм установки:
- Нажмите 【CLOCK】 — замигает значок

- В течение 5 секунд кнопками 【+】/【-】 установите время
- Повторно нажмите 【CLOCK】 для подтверждения
6. Отображение температуры 【TEMP】
Переключение режимов индикации (не во всех моделях):
 — заданная температура
 — температура в помещении
 — температура снаружи
Переключение °C/°F: в режиме 【OFF】 одновременно нажмите 【-】 и 【MODE】.
7. Регулировка температуры 【+】/【-】
Кнопки изменяют заданное значение с шагом 1°. Удержание более 2 секунд ускоряет изменение.
Диапазон: 16–30°C. Переключение шкал: одновременное нажатие 【+】 и 【-】 в режиме 【OFF】.
8. Самоочистка 【BLOW】
Активируется в режимах 【COOL】 или 【DRY】. На дисплее появляется  . После выключения вентилятор работает 10 минут на низкой скорости для просушки испарителя.
9. Интенсивный режим 【TURBO】
Вентилятор работает на сверхвысокой скорости для быстрого выхода на заданную температуру. Индикатор:  . При изменении скорости 【TURBO】 автоматически отключается.
10. Подсветка 【LIGHT】
Включает/выключает подсветку панели внутреннего блока. Удобно для ночного использования.
11. Управление жалюзи
Нажатие кнопки меняет угол и режим качания:
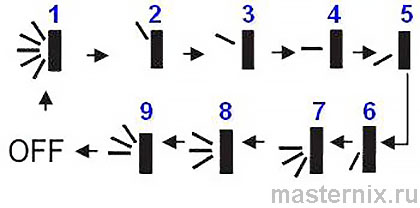
Особенности:
- В позициях "7", "8", "9" угол одинаков для всех направлений
- Режим "1" охватывает весь угол обдува
- Удержание 2 секунды запускает авто-качание
- Отпускание фиксирует жалюзи в текущем положении
12–13. Таймер 【TIMER ON】/【TIMER OFF】
Установка включения:
- Нажмите 【TIMER ON】 — замигает "HOUR ON"
- Кнопками 【+】/【-】 установите время (шаг 1 минута)
- В течение 5 секунд подтвердите нажатием 【TIMER ON】
Для отмены — ещё раз нажмите кнопку. Алгоритм для 【TIMER OFF】 аналогичен.
Режимы работы и их активация
Автоматический режим 【AUTO】
Кондиционер сам поддерживает комфорт 23±2°C:
- При +20°C и ниже — включается обогрев
- При +26°C и выше — активируется охлаждение
Ручная регулировка температуры в этом режиме недоступна.
Охлаждение 【COOL】 и обогрев 【HEAT】
Точность поддержания: ±1°C.
Важные нюансы:
- В 【COOL】: если заданная температура выше комнатной более чем на 1°C — система не запустится
- В 【HEAT】: если заданная ниже комнатной более чем на 1°C — кондиционер не включится
Осушение 【DRY】
Поддержание температуры с точностью ±2°C. При превышении заданной более чем на 2°C система переключается в охлаждение.
При достижении температуры ниже заданной более чем на 2°C компрессор останавливается, внутренний вентилятор работает на минимуме.
Логика ночного режима 【SLEEP】
При охлаждении
- Через 1 час: температура +1°C
- Ещё через час: +1°C (итого +2°C)
- Дальнейшее поддержание на этом уровне
При обогреве
- Через 1 час: температура -1°C
- Ещё через час: -1°C (итого -2°C)
- Поддержание достигнутого значения
(!) В режиме 【SLEEP】 функция таймера не активируется.
Программирование таймера
Практические сценарии использования
Таймер экономит электроэнергию и повышает комфорт. Примеры:
- ✔️ Включить кондиционер за 30 минут до возвращения домой
- ✔️ Выключить систему через 2 часа после засыпания
- ✔️ Запрограммировать ежедневное включение к определённому времени
Зона индикации таймера временно показывает заданное время, затем возвращается к отображению текущего времени или температуры.
Дополнительные функции и настройки
Самоочистка 【BLOW】 — зачем она нужна
Функция удаляет влагу с испарителя, предотвращая рост бактерий и появление неприятного запаха.
Активация:
- В режимах 【COOL】 или 【DRY】 нажмите 【BLOW】
- После выключения 【ON/OFF】 вентилятор работает 10 минут
Для принудительной остановки — повторно нажмите 【BLOW】.
Блокировка кнопок
Защита от случайных нажатий (актуально для семей с детьми):
- В режиме 【ON】 одновременно нажмите 【+】 и 【-】
- На дисплее появится значок блокировки
- Для разблокировки — повторите сочетание
Принудительная разморозка
В режиме 【OFF】 одновременно нажмите 【BLOW】 и 【MODE】 для включения/выключения функции разморозки.
При активации в зоне температуры загорается символ H1. Если функция включена, при запуске обогрева символ мигает 5 секунд.
Автооттаивание внутреннего блока
При низкой температуре теплообменник может обмерзать. При достижении 0°C:
- Компрессор и вентиляторы останавливаются
- На панели мигает индикатор
- После разморозки работа возобновляется автоматически
Замена элементов питания
Пошаговая инструкция
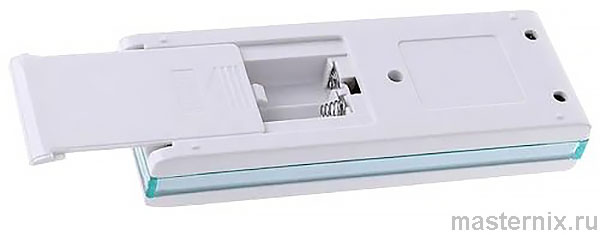
- Сдвиньте крышку батарейного отсека по направлению стрелки
- Извлеките старые элементы типа AAA (1,5 В)
- Вставьте новые батарейки, соблюдая полярность
- Задвиньте крышку до фиксации
Требования к элементам питания
- Используйте только новые щелочные батарейки
- ✖️ Не смешивайте старые и новые элементы
- ✖️ Не применяйте батарейки разных типов
- Срок службы — не более 1 года
При длительном простое извлеките батарейки для предотвращения протекания электролита.
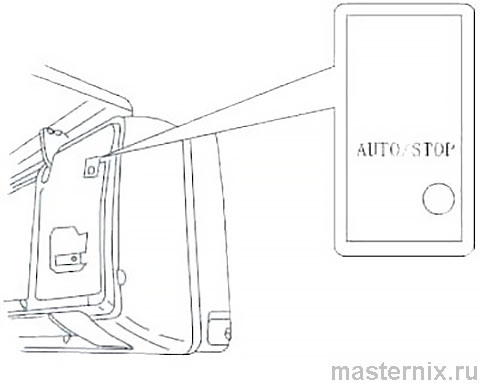
Аварийное управление без пульта
Механический переключатель на внутреннем блоке
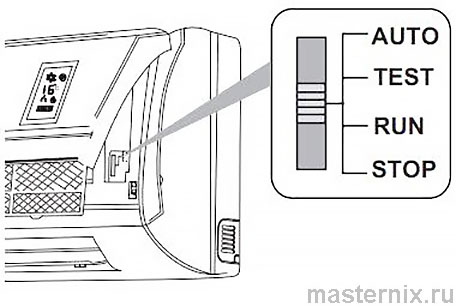
При утере или неисправности пульта используйте переключатель на самом кондиционере.
Модели до 5 кВт
- 【RUN】 — стандартная работа от пульта
- 【AUTO】 — автономный режим при потере пульта
- 【TEST】 — сервисный режим (не использовать пользователям)
Модели 5–6 кВт
Одно нажатие кнопки включает автоматический режим. Кондиционер сам выбирает охлаждение, обогрев или вентиляцию. Повторное нажатие останавливает работу.
Диагностика и решение проблем
Если пульт не реагирует
Возможные причины:
- Сели батарейки → замените элементы
- Препятствия между устройствами → уберите преграды
- Превышена дальность → подойдите ближе 10 метров
- Загрязнён ИК-передатчик → протрите мягкой тканью
- Активирована блокировка → разблокируйте 【+】/【-】
Кондиционер не включается
Проверьте:
- Подачу электропитания на внутренний блок
- Правильность выбранного режима
- Соответствие заданной температуры условиям запуска
- Положение аварийного переключателя
Профилактика для стабильной работы
Несколько советов:
- ✔️ Очищайте фильтры раз в 2 недели
- ✔️ Используйте 【BLOW】 после работы в режиме охлаждения
- ✔️ Не направляйте поток воздуха на людей
- ✔️ Проверяйте плотность закрытия окон при работе
- ✔️ Храните пульт в сухом месте
Соблюдение рекомендаций продлит срок службы вашей сплит-системы Monlan и обеспечит комфортный микроклимат.


