Instruction for the 3D LED Digital Alarm Clock desktop electronic clock with large illuminated digits
Руководство / инструкция
Что такое 3D LED Alarm Clock и какие функции доступны
Основные возможности: время, дата, температура и будильник в одном корпусе
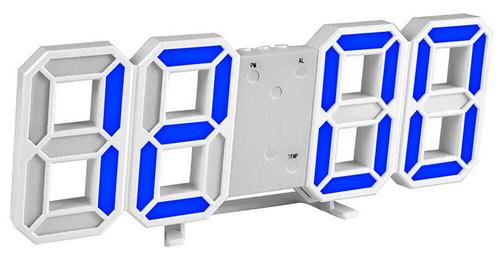
3D LED Digital Alarm Clock — это не просто часы. Это универсальный гаджет, который показывает время, дату, температуру и будит вас утром. Представьте: вы просыпаетесь, смотрите на яркий дисплей — и сразу видите всё, что нужно. Никаких лишних движений.
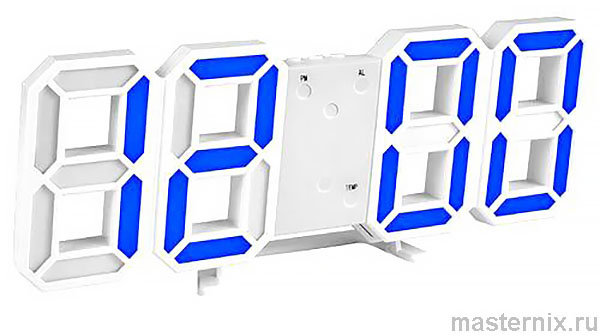
Устройство доступно в четырёх цветовых вариантах: белые, зелёные, красные или синие цифры на белом фоне. Выбирайте под интерьер — или под настроение. Это нормально: эстетика тоже важна.
Скажу прямо: для тех, кто ценит минимализм и функциональность, это идеальное решение. Четыре кнопки управления, понятный интерфейс, автоматическая регулировка яркости. Всё работает как надо.
Кстати, диапазон рабочих температур от 0 до 50 °С покрывает большинство бытовых условий. Но если планируете использовать на балконе или в гараже — учитывайте нижний предел. Стоит подумать заранее.
Установка и питание: настольное или настенное размещение
Два способа крепления и выбор источника энергии
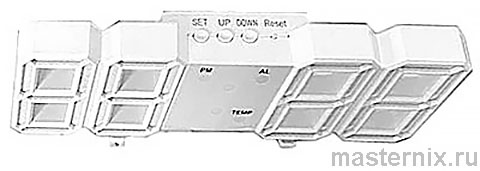
Часы можно разместить двумя способами: поставить на стол или повесить на стену. На задней панели предусмотрены крепёжные отверстия. Всё просто, но есть нюансы.
Питание — гибкое: либо от адаптера 【DC5V】, либо от батарейки 【CR2032】. При установке батарейки соблюдайте полярность: неправильное подключение не повредит устройство, но часы не включатся. Логично, правда?
Важно добавить: после установки батарейки дисплей загорается автоматически, раздаётся звуковой сигнал, и устройство входит в меню настроек. Это удобно: не нужно искать кнопку включения.
Если честно, для постоянного использования лучше подключить адаптер. Батарейка — хороший вариант для резервного питания или временного размещения. Баланс, как он есть.
Три режима дисплея: как переключаться между отображением данных
Подробное описание режимов 【dp-1】, 【dp-2】 и 【dp-3】
Полная версия часов поддерживает три режима отображения. Понимание разницы между ними помогает настроить устройство под свои привычки.
Режим 【dp-1】 — автоматическая циклическая прокрутка. Дисплей показывает время 10 секунд, затем дату 2 секунды, потом температуру 2 секунды — и возвращается ко времени. Идеально, когда нужно видеть всё, но не хочется листать вручную.
Режим 【dp-2】 — фиксированное отображение. Вы выбираете, что показывать постоянно: время, дату или температуру. Удобно, когда важен один конкретный параметр.
Режим 【dp-3】 — приоритет времени. Дисплей всегда показывает время. Если вы переключились на дату или температуру, через 15 секунд бездействия устройство автоматически вернётся к времени. Это защита от «забывчивости».
Заметьте: переключение между режимами происходит через меню настроек. Но об этом — в следующем разделе. Всё логично: сначала понимаем «что», потом «как».
Настройка времени и даты: пошаговая инструкция без ошибок
Выбор формата часов и установка текущих значений
Настройка времени — базовая функция. Разберём по шагам, чтобы не запутаться в кнопках.
- В режиме работы часов нажмите и удерживайте кнопку 【SET】 две секунды — устройство войдёт в меню настроек.
- Выберите формат: 12 или 24 часа. Используйте кнопки 【UP】 / 【DOWN】 для изменения значения.
- Нажмите и удерживайте 【SET】 для подтверждения и перехода к установке часов.
- Кнопками 【UP】 / 【DOWN】 задайте часы, затем удерживайте 【SET】 для перехода к минутам.
- Повторите для минут. Для выхода из режима удерживайте 【SET】.
Установка даты: в режиме отображения даты удерживайте 【SET】, затем задайте год (2000–2099), месяц и день аналогичным способом. Подтверждайте каждый шаг удержанием 【SET】.
По факту, вся процедура занимает меньше минуты. Но точность важна: одна ошибка — и придётся начинать заново. Впрочем, это нормально: защита от случайных изменений.
Настройка будильника: три режима звукового оповещения
Различия между 【AL1】, 【AL2】 и 【AL3】 для гибкого управления
Будильник в 3D LED Alarm Clock — это не просто «пищалка». Устройство поддерживает три режима:
- 【AL1】 — будильник отключён. Подходит, когда сигнал не нужен.
- 【AL2】 — беззвучный режим. Дисплей мигает, но звука нет. Идеально для тихого пробуждения.
- 【AL3】 — со звуковым сигналом. Классический будильник для тех, кому нужно «встряхнуться».
Настройка времени срабатывания аналогична установке текущего времени: войдите в режим будильника, задайте часы и минуты кнопками 【UP】 / 【DOWN】, подтвердите удержанием 【SET】.
Скажу прямо: возможность выбрать режим — это серьёзное преимущество. Можно настроить тихое пробуждение в будни и громкий сигнал в выходные. Гибко и удобно.
Между прочим, если настраиваете только один будильник, не забудьте выйти из меню — иначе изменения могут не сохраниться. Тут всё ясно: дисциплина в настройке = надёжность в работе.
Управление яркостью: автоматическое затемнение по времени суток
Как работает функция авто-яркости и когда она полезна
Яркость дисплея регулируется автоматически — и это удобно. Ночью яркий свет мешает спать, днём тусклый плохо читается. Устройство решает эту проблему само.
| Время суток | Яркость дисплея |
|---|---|
| 19:00 – 5:59 | Автоматическое снижение до 70% |
| 6:00 – 18:59 | Полная яркость 100% |
Что получается в итоге? Вечером дисплей не слепит глаза, утром — хорошо виден даже при ярком свете. Это серьёзно повышает комфорт использования.
Возможно, сначала кажется, что автоматика — это «чёрный ящик». Но на практике всё работает предсказуемо. Опыт подсказывает: доверьтесь технологии, она не подведёт.
Режим энергосбережения: активация голосового управления
Условия работы функции звуковой активации дисплея
В обычном режиме одно нажатие кнопки 【DOWN】 включает режим энергосбережения. Индикация на кнопке: 【ON SD】 — режим активен, 【--- SD】 — выключен.
Как это работает:
- При включённом режиме 【SD】 дисплей тускнеет через 15 секунд бездействия.
- Если внешний звук достигает 75 дБ (хлопок, голос, стук) — дисплей снова включается на 15 секунд.
Важно: функция голосового управления работает только при питании от сети. На батарейке эта опция недоступна — сделано для экономии заряда. Логично, правда?
Заметьте: порог в 75 дБ — это достаточно громкий звук. Обычный разговор может не сработать. Но хлопок или команда «Эй!» — вполне. Это нормально: защита от ложных срабатываний.
По факту, режим 【SD】 полезен, когда часы стоят в спальне. Ночью дисплей не светит, а утром достаточно хлопнуть — и время перед глазами. Работает.


