User manual for the wired remote control of the HIGH LIFE ACHL air conditioner
Руководство / инструкция
 Скажу прямо: хороший пульт — половина комфорта при использовании кондиционера. HIGH LIFE ACHL выглядит просто, но скрывает полезные функции, о которых многие не догадываются. Давайте разберёмся, как настроить его под свои задачи без лишних сложностей.
Совместимые модели сплит-систем
Поддерживаемые пары блоков
Пульт работает с линейкой кондиционеров HIGH LIFE серии ACHL. Вот полный список совместимых комбинаций:
| Наружный блок | Внутренний блок |
|---|---|
| ACHL-07PC-CHDV02SO | ACHL-07PC-CHDV02SI |
| ACHL-09PC-CHDV02SO | ACHL-09PC-CHDV02SI |
| ACHL-12PC-CHDV02SO | ACHL-12PC-CHDV02SI |
| ACHL-18PC-CHDV02SO | ACHL-18PC-CHDV02SI |
| ACHL-24PC-CHDV02SO | ACHL-24PC-CHDV02SI |
Важный момент: перед покупкой уточните у дилера точную модель вашего кондиционера. Совместимость — база, без неё пульт просто не будет управлять блоком.
Кнопки управления и их назначение
Основные клавиши
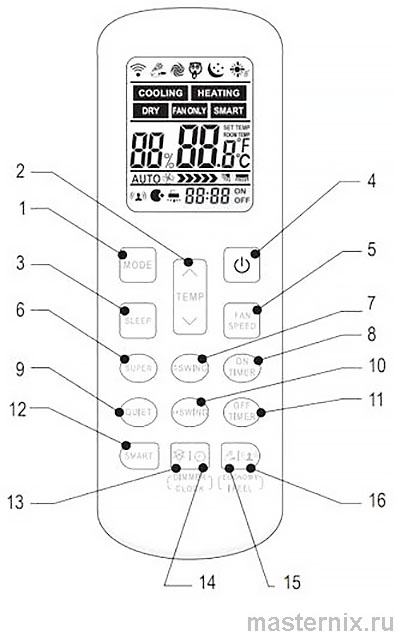
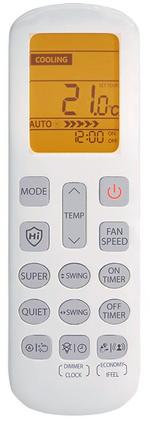
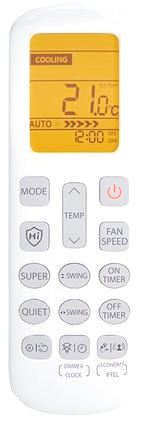
Разберём по порядку: кнопка 【MODE】 переключает режимы работы, 【TEMP】 регулирует температуру и настройки таймера, 【SLEEP】 активирует ночной режим, 【POWER】 включает и выключает систему.
【FAN SPEED】 управляет оборотами вентилятора: 【HIGHER】 → 【HIGH】 → 【MEDIUM】 → 【LOW】 → 【LOWER】. Циклично, предсказуемо — запомнить легко.
Дополнительные функции
【SUPER】 — режим форсированного охлаждения или обогрева. При охлаждении: максимальная скорость вентилятора, температура 16 °С. При обогреве: авторежим скорости, 30 °С. Идеально, когда нужно быстро изменить микроклимат.
【SWING】 (горизонтальные жалюзи) и вторая 【SWING】 (вертикальные) управляют направлением воздушного потока. Нажимайте, пока не получите нужный угол — просто.
【QUIET】 включает бесшумный режим: минимальные обороты вентилятора, минимальный шум. Для спальни — то, что нужно.
【TIMER ON】 / 【TIMER OFF】 программируют автозапуск и остановку. 【CLOCK】 устанавливает текущее время. 【ECONOMY】 активирует энергосберегающий алгоритм.
⚠️ Кнопка 【IFEEL】 в данной серии не активна — не тратьте время на её поиск в меню.⚠️ Функция 【8°C HEAT】 доступна опционально: одновременное нажатие 【TEMP▲】 + 【SWING】 включает поддержание минимальной температуры +8 °С — полезно для дач в межсезонье.
Индикаторы дисплея и расшифровка
Значки на экране пульта
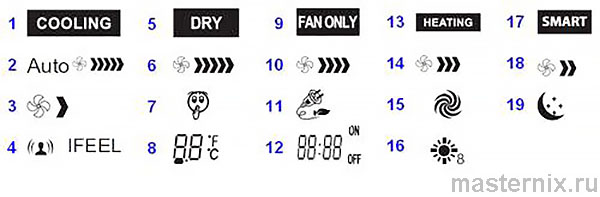
Разберём обозначения: 【Охлаждение】, 【Обогрев】, 【Осушение】, 【Вентиляция】 — основные режимы. Индикаторы скорости: 【Auto】, 【Higher】, 【High】, 【Medium】, 【Low】, 【Lower】.
Спецзначки: 【Quiet】 (минимальный шум), 【Economy】 (экономия энергии), 【Super】 (турбо), 【Sleep】 (ночной режим), 【SMART】 (интеллектуальный режим), 【8°C Heat】 (защита от промерзания).
Дисплей температуры показывает заданное значение. Дисплей таймера/времени отображает настройки автозапуска или текущие часы.
Выбор режима работы и температуры
Последовательность переключения
Нажимайте 【MODE】 для цикла: 【AUTO】 → 【COOL】 → 【DRY】 → 【HEAT】 → 【FAN】. Каждый режим решает свою задачу:
✔️ 【AUTO】 — система сама подбирает параметры под текущую температуру.
✔️ 【COOL】 — охлаждение в жару, основная летняя функция.
✔️ 【DRY】 — осушение воздуха при высокой влажности без сильного охлаждения.
✔️ 【HEAT】 — обогрев в межсезонье, когда центральное отопление ещё не включили.
✔️ 【FAN】 — только циркуляция воздуха, без изменения температуры.
Кнопками 【TEMP▲】 / 【TEMP▼】 задайте целевую температуру. Диапазон зависит от модели блока — обычно 16–30 °С.
Управление вентилятором и жалюзи
Регулировка скорости потока
【FAN SPEED】 переключает пять уровней: 【HIGHER】 (максимум) → 【HIGH】 → 【MEDIUM】 → 【LOW】 → 【LOWER】 (минимум). Для тихой работы ночью выбирайте 【LOWER】, для быстрого охлаждения — 【HIGHER】.
Настройка направления воздуха
Первая 【SWING】 управляет горизонтальными заслонками: включение качания → фиксация в текущем положении → выключение. Вторая 【SWING】 работает с вертикальными жалюзи аналогичным образом.
Совет: направляйте поток воздуха параллельно полу — так холодный воздух распределяется равномернее, без сквозняков.
Спецрежимы: турбо, сон, экономия
Режим 【SUPER】 для быстрого результата
Нажмите 【SUPER】 для активации максимальной производительности. Система работает на пределе, чтобы быстрее достичь заданной температуры. После достижения цели режим отключается автоматически.
Не используйте 【SUPER】 постоянно — это увеличивает расход энергии и нагрузку на компрессор. Оставьте его для экстренных случаев.
Ночной режим 【SLEEP】
Активация: кнопка 【SLEEP】. Алгоритм адаптирует работу под естественные ритмы сна:
• В режиме охлаждения: температура плавно повышается на 1–2 °С за ночь.
• В режиме обогрева: температура мягко снижается.
✔️ Результат: комфортный сон без переохлаждения и лишнего шума.
Энергосбережение 【ECONOMY】
【ECONOMY】 оптимизирует работу компрессора и вентилятора для снижения потребления электричества. Комфорт сохраняется, счета — уменьшаются. Включайте в режиме длительной работы.
Программирование таймера включения и выключения
Установка автозапуска и остановки
【TIMER ON】 — программирование включения. 【TIMER OFF】 — настройка выключения. Алгоритм:
1) Нажмите соответствующую кнопку таймера.
2) Кнопками 【TEMP▲】 / 【TEMP▼】 задайте время (шаг обычно 0,5–1 час).
3) Подтвердите настройку — индикатор таймера зафиксируется на дисплее.
4) Кондиционер выполнит команду в заданное время с сохранёнными параметрами.
Полезная фишка: настройте включение за 30 минут до возвращения домой — придёте в уже прохладную комнату. Или запрограммируйте выключение на ночь — экономия без потери комфорта.
Замена элементов питания
Пошаговая инструкция
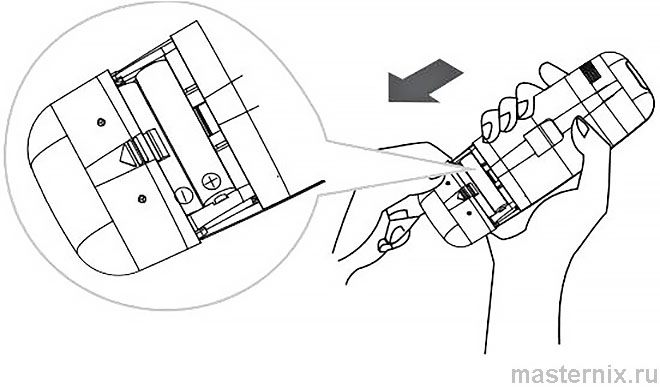
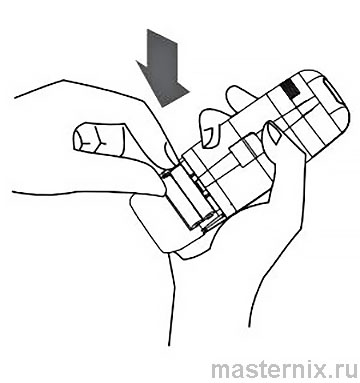
1) Сдвиньте крышку отсека по направлению стрелки.
2) Извлеките старые элементы, вставьте две новые батарейки типа 【LR03 AAA】 1,5 В, соблюдая полярность 【+】 / 【–】.
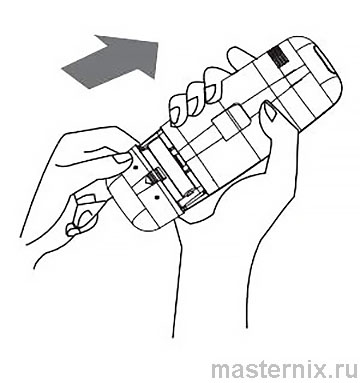
3) Закройте крышку до щелчка.
⚠️ Не используйте аккумуляторы — напряжение может отличаться, что приведёт к некорректной работе.
⚠️ Меняйте батарейки при первом признаке мерцания дисплея — не ждите полного отказа.
Правила эксплуатации и хранения
Меры предосторожности
Не допускайте попадания влаги на пульт — риск короткого замыкания и поражения током. Не нажимайте кнопки острыми предметами: мембраны рассчитаны на палец, а не на ключ или отвёртку.
Для управления направляйте пульт на внутренний блок. Максимальная дальность — до 7 метров при прямой видимости. Стены, мебель, зеркала могут ослабить ИК-сигнал.
Хранение и крепление
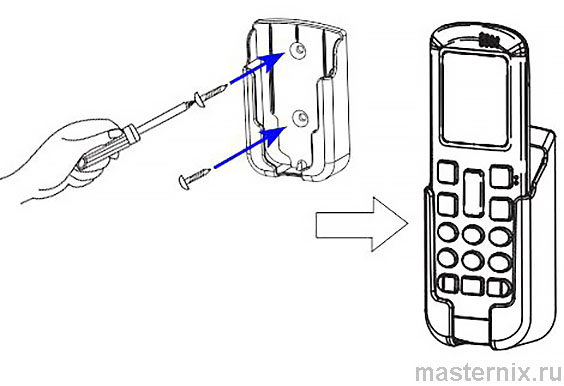
Пульт можно закрепить на стене с помощью опционального держателя — так он всегда будет под рукой и не потеряется. Храните в сухом месте, вдали от источников тепла и прямых солнечных лучей.
⚠️ Не разбирайте пульт самостоятельно — внутри нет пользовательских компонентов для ремонта. Любое вмешательство аннулирует гарантию.
Решение типичных проблем
Если пульт не реагирует
Проверьте базовые вещи: батарейки свежие? Полярность соблюдена? Направляете ли вы пульт на блок? Нет ли препятствий на пути ИК-сигнала?
Если дисплей мигает или погас — замените элементы питания. Если кнопки нажимаются, но блок не реагирует — возможно, проблема в приёмнике внутреннего блока. Обратитесь в сервис.
Важный нюанс: не производите диагностику и ремонт самостоятельно. Поручайте это квалифицированным специалистам — так вы сохраните гарантию и избежите серьёзных поломок.
Советы для стабильной работы
Рекомендации от практиков
Держите пульт в чистоте: пыль и жир с пальцев со временем забивают зазоры между кнопками. Протирайте мягкой сухой тканью — без спирта и абразивов.
Если используете пульт редко, извлеките батарейки при длительном хранении — это предотвратит окисление контактов.
Есть нюансы: в мульти-сплит системах некоторые функции (например, 【SMART】) могут быть недоступны. Это ограничение архитектуры системы, а не дефект пульта.
Проверяйте работу пульта после замены батареек: иногда требуется повторная синхронизация с блоком. Просто направьте пульт на кондиционер и нажмите 【POWER】 — если блок отреагировал, всё в порядке.


