User manual for the Rapid RAC-09 CE/N6\_22Y remote control
Руководство / инструкция
Rapid RAC-09 CE/N6_22Y Air Conditioner Remote Control. Operating Instructions
Compatibility
Rapid RAC-07 CE/N6 mobile air conditioner
Rapid RAC-09 CE/N6 mobile air conditioner
Thank you for your choice!
Dear Customer, we appreciate your decision, which we are confident will make your life more comfortable and pleasant.
Please read this user manual carefully to ensure correct operation of your new air conditioner and to enjoy all its advantages for a long time.
Warranty service is provided in accordance with the warranty obligations specified in the warranty card.
Safety precautions
❗👉➨ Attention
The appliance operates on R290 refrigerant.
Risk of ignition in case of leakage.
❗👉➨ Attention
1. Any repair work must be carried out in an authorized service center;
2. The appliance must not be placed in close proximity to heat sources or heating devices;
3. The room in which the appliance operates must be well ventilated;
4. The appliance must be protected from mechanical damage and tipping.
❗👉➨ Note:
In this manual, the mobile air conditioner may also be referred to by such technical terms as appliance, device, unit, air conditioner, etc.
Air conditioner control panel on the unit housing
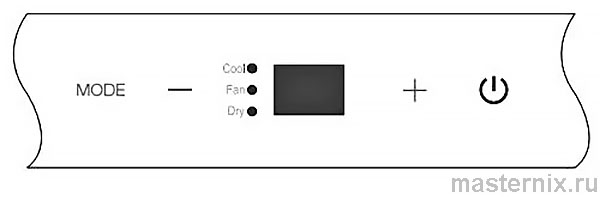
1. Power on/off " "
"
Pressing the power button starts the air conditioner in automatic mode for both operating mode and fan speed. Pressing the button again turns the unit off.
2. Temperature adjustment
Press the “-” and “+” buttons to select the desired temperature.
3. Switching operating modes
The MODE button activates four possible operating modes: Cooling / Dehumidification / Ventilation / Auto (COOL / DRY / FAN / AUTO). Use the MODE button to select the mode. The corresponding indicator light will illuminate next to the selected mode.
.
Rapid RAC Air Conditioner Operating Modes
Cooling mode
➠ Press the mode selection button until the Cooling mode (COOL) indicator lights up;
➠ Press the “-” and “+” buttons to set the desired temperature in the range from 17°C to 30°C;
❗👉➨ Note:
In this mode, fan speed can be adjusted using the FAN SPEED button on the remote control.
In this mode, an air exhaust duct must be connected to vent hot air outside the cooled room.
Dehumidification mode
➠ Press the mode selection button until the Dehumidification mode (DRY) indicator lights up;
❗👉➨ Note:
In this mode, temperature and fan speed settings cannot be changed.
An air exhaust duct is not required in this mode.
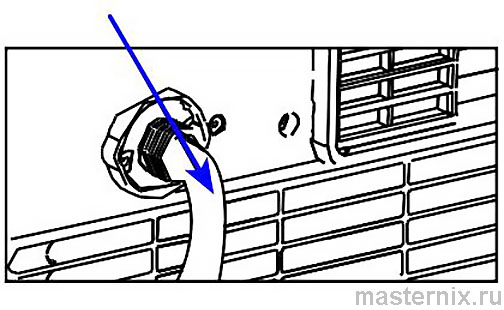
For continuous condensate drainage, remove the cover from the upper drainage port and connect a drainage hose using a universal drainage adapter.
Ventilation mode
➠ Press the mode selection button (MODE) until the Ventilation mode (FAN) indicator lights up;
➠ The fan speed can be adjusted using the FAN SPEED button on the remote control.
❗👉➨ Note:
Temperature selection is not available in this mode.
An air exhaust duct is not required in this mode.
Timer mode
The timer mode allows delayed start or shutdown of the appliance. This helps save electricity when the unit is not needed.
Delayed start
➠ Plug in the appliance. Press the Timer On button on the remote control. The timer indicator (h) will appear. Press the Timer On button repeatedly to set the number of hours until the unit starts. The time interval can be set from 0.5 to 24 hours. The delayed start timer setting is completed approximately 2 seconds after the desired time is entered. The “h” symbol disappears from the display, and the unit enters standby mode. The unit will start in the mode that was set before it was turned off.
➠ To cancel the timer, use the “-” and “+” buttons to reduce the previously set number of hours to zero, then press the timer button again — the indicator will turn off.
➠ To set delayed shutdown, press the Timer Off button on the remote control when the appliance is on and operating in any mode. The timer-off indicator (h) will light up on the panel.
➠ Press the Timer Off button to select the time after which the unit will automatically turn off. To cancel the settings, press the timer button again and use the “-” and “+” buttons to reduce the previously set hours to zero — the indicator will turn off. The delayed shutdown timer setting is completed approximately 2 seconds after the desired time is entered. The “h” symbol disappears from the display, and the unit enters standby mode.
Sleep / Economy mode
Turn on the appliance. Select Sleep mode by pressing the ECONOMY button on the remote control. In cooling mode, the temperature will gradually increase by 2°C from the current setting over one hour, and the fan will switch to the lowest speed. The temperature will then be maintained at this level for 7 hours, after which the unit will return to the mode that was set before entering Sleep mode.
❗👉➨ Note:
This option is available in Cooling or Auto modes.
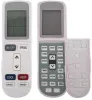
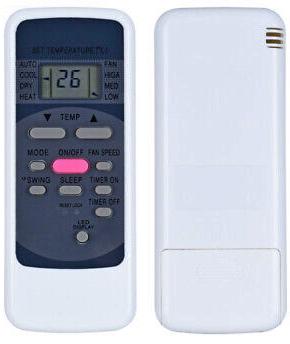
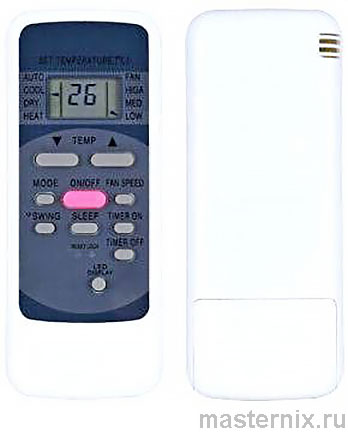
Remote control
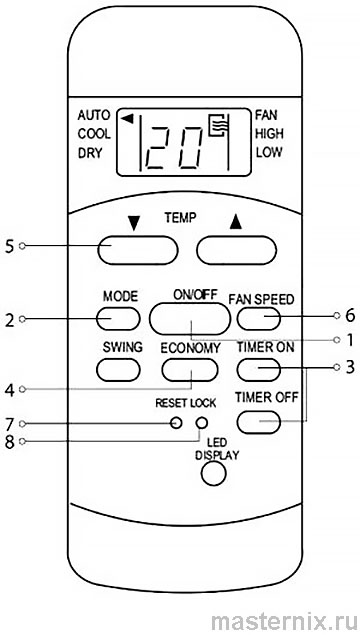
1 Power On/Off
2 Operating mode selection
3 Timer buttons
4 Economy/Sleep mode
5 Temperature adjustment
6 Fan speed
7 This button resets all previously set settings
8 This button locks all remote control buttons; pressing again unlocks them.
Related articles:
Air conditioners: main functions and operating modes